Custom Dash Is Done
Posted: Mon Feb 24, 2014 5:26 am
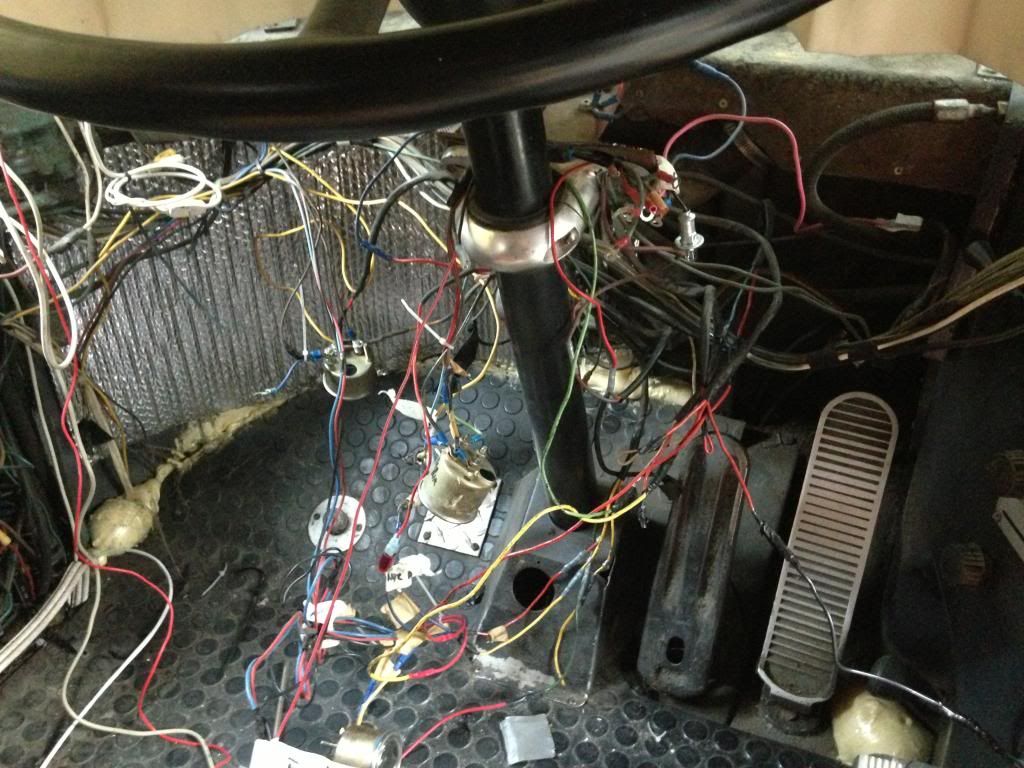
Well it began as an idea and then it escalated to a major re-wire and even bigger price tag when i was done, but it is finally done and all works like new again. Here is a few pics
[img]http://i1207.photobucket.com/albums/bb4 ... G_0060.jpg[/img]
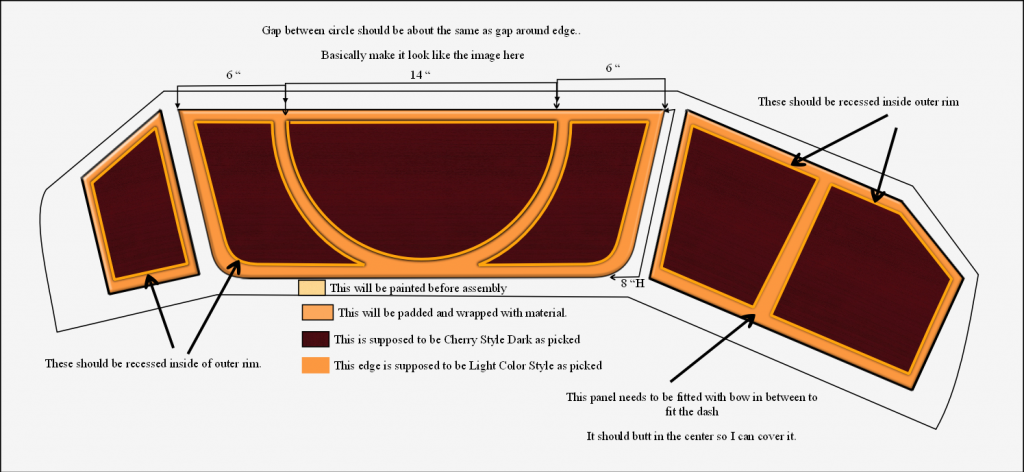
This is the Original Design I Drew on the Computer. Don't use the measurements, I changed them before cnc cut it all out.
[img]http://i1207.photobucket.com/albums/bb4 ... Dashv2.png[/img]
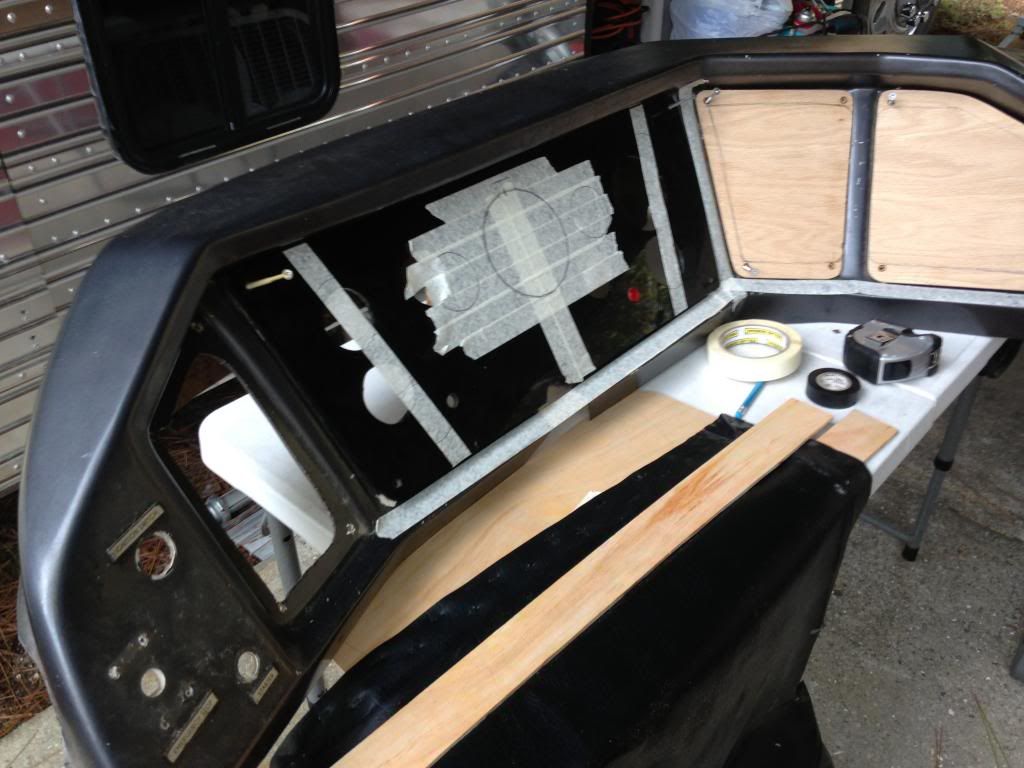
Here I was playing with more ideas
[img]http://i1207.photobucket.com/albums/bb4 ... G_0073.jpg[/img]
This is the center panel after it was made on a cnc machine and before it was wrapped in Leather.
[img]http://i1207.photobucket.com/albums/bb4 ... G_0076.jpg[/img]
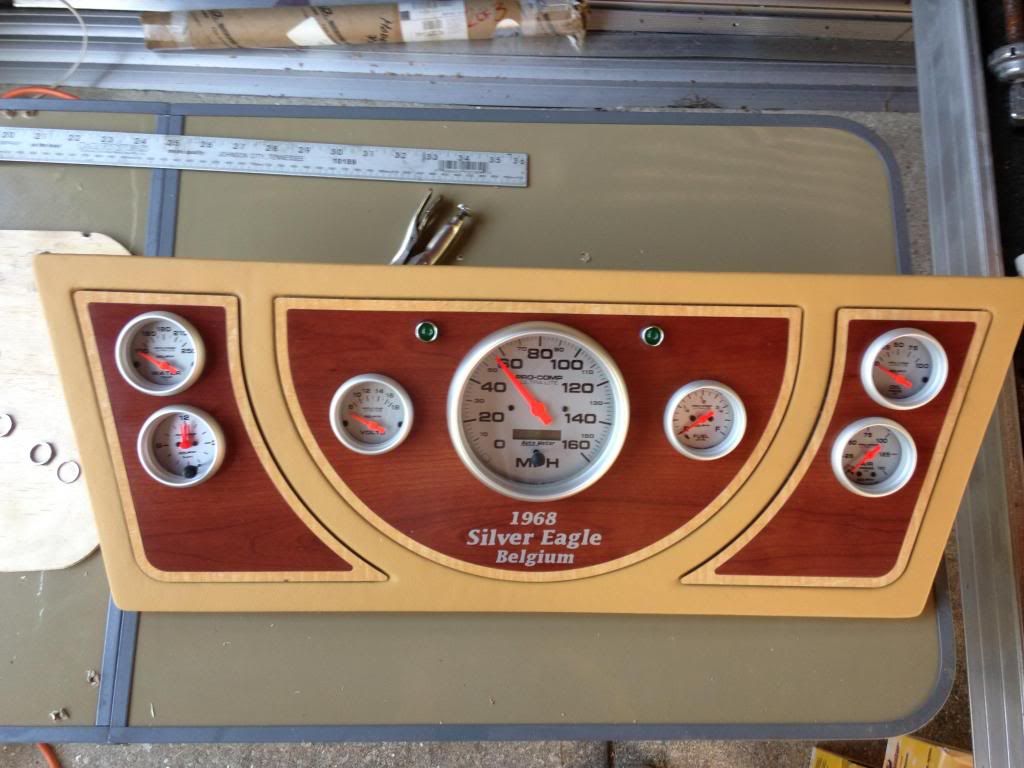
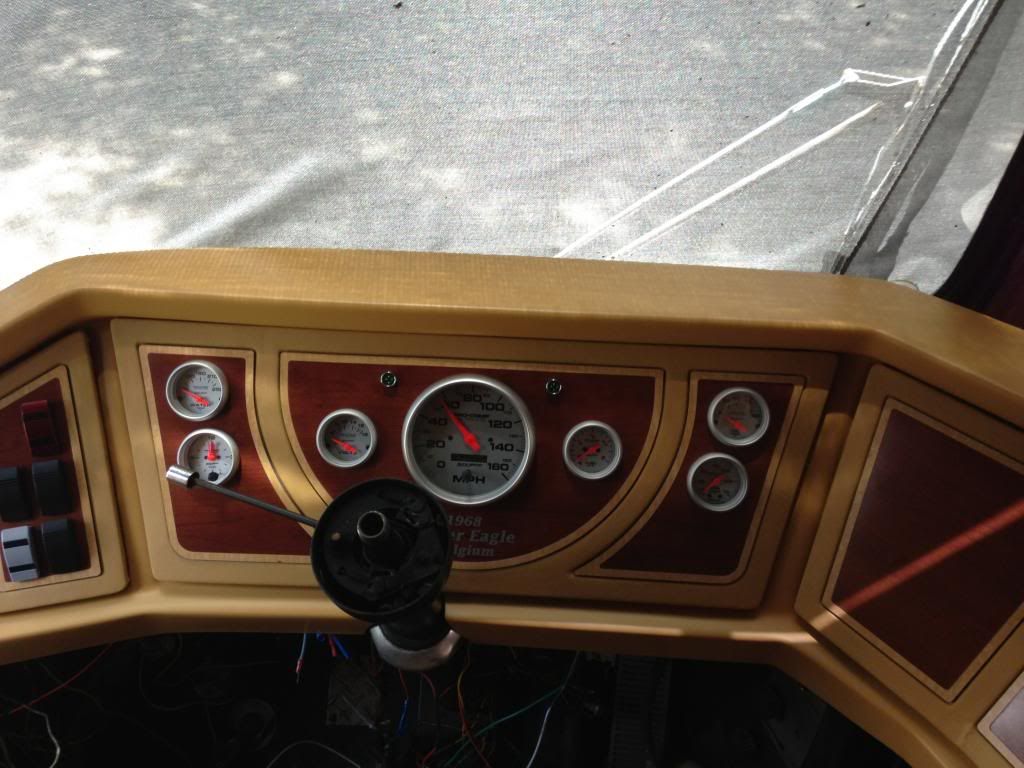
Here, the new Autometer Gauges are in position and the leather is wrapped around the edges. The Turn Signals were bought at Radio Shack. Who would have guessed?
The Center Speedometer is programable and is claimed to work on the eagle.
[img]http://i1207.photobucket.com/albums/bb4 ... G_0100.jpg[/img]
The dash is back in the bus for fitting. I Sprayed R&M Dash with a Matched Automotive paint designed for Vinyl and Leather. The CNC work really changes the look.[img]http://i1207.photobucket.com/albums/bb4 ... G_0106.jpg[/img]
This is the Circuit Breaker Box I made.
[img]http://i1207.photobucket.com/albums/bb4 ... G_0854.jpg[/img]
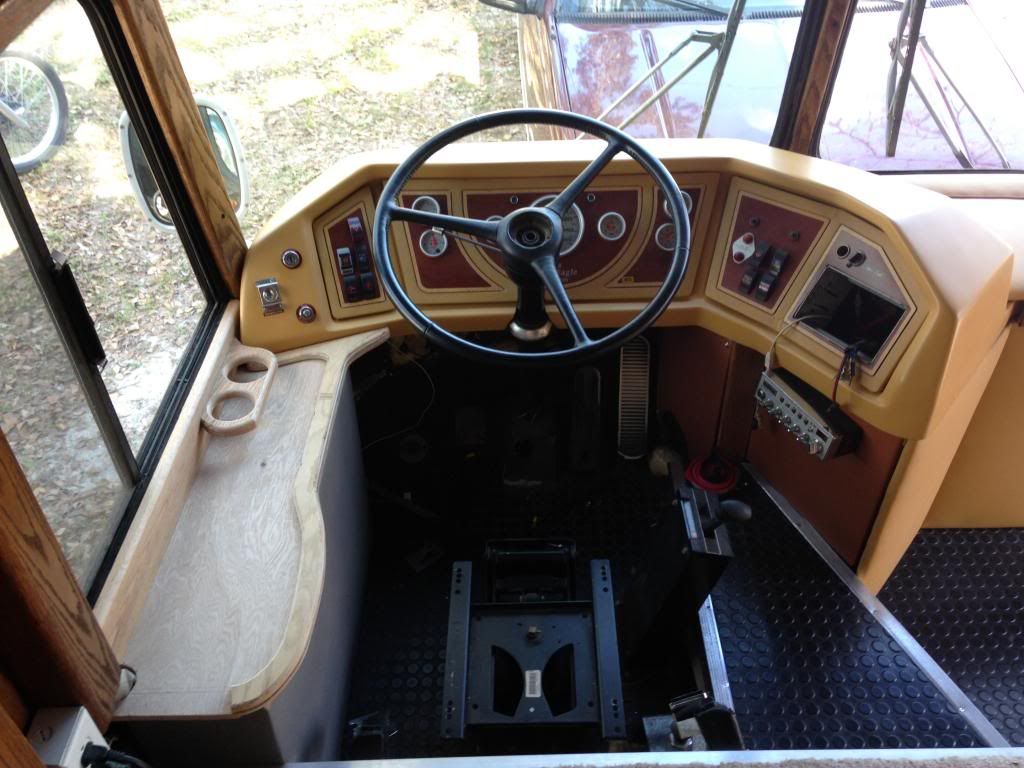
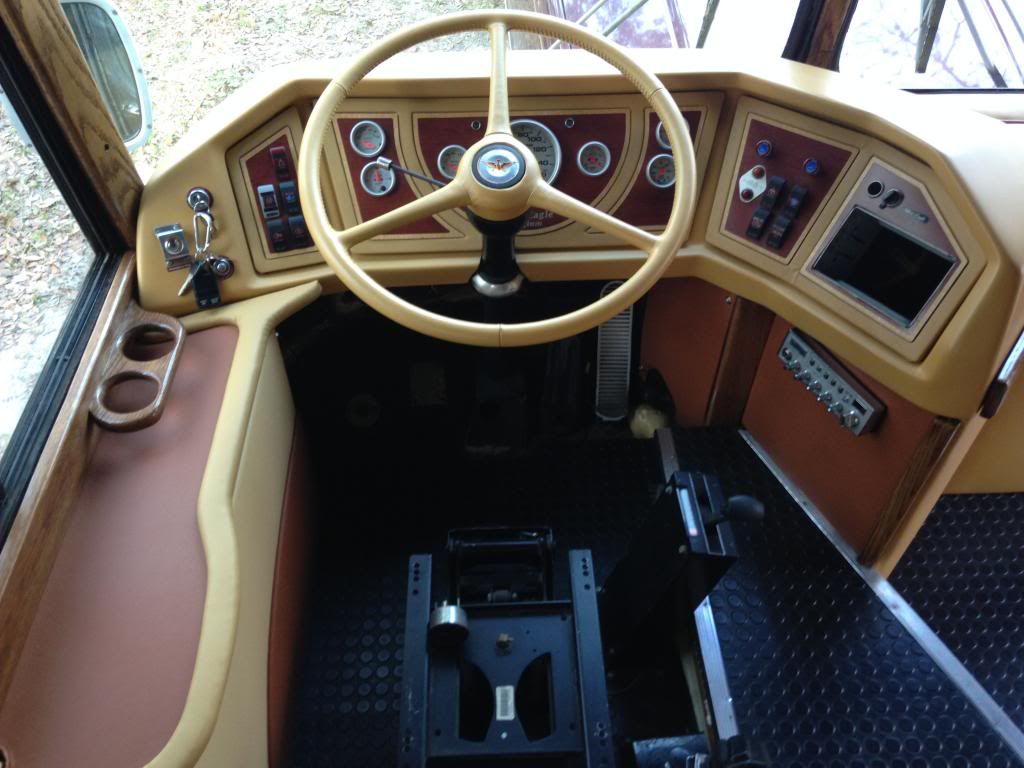
Here is the whole dash with the gauges and new rocker switches in place. The circuit breaker box fit nice and I designed it that way to give compliment to the left side of the dash. [img]http://i1207.photobucket.com/albums/bb4 ... G_0862.jpg[/img]
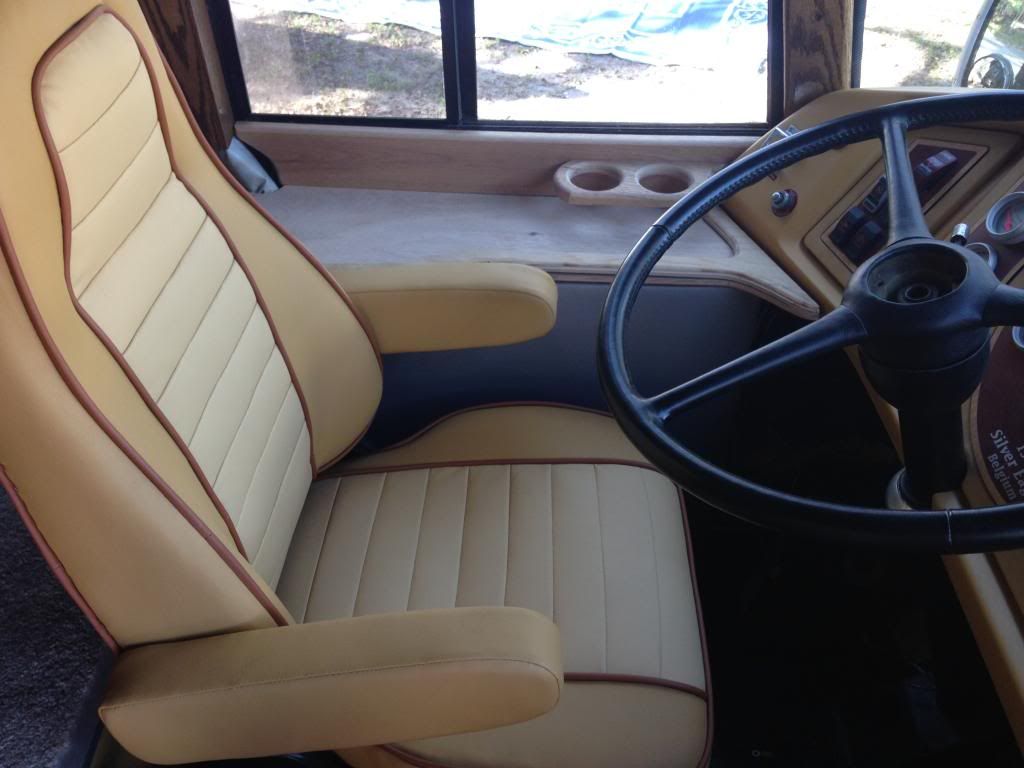
Now I added the Oak Cup Holders on side rest pamel and checking to make sure seat doesn't rub circuit breaker box
[img]http://i1207.photobucket.com/albums/bb4 ... G_0866.jpg[/img]
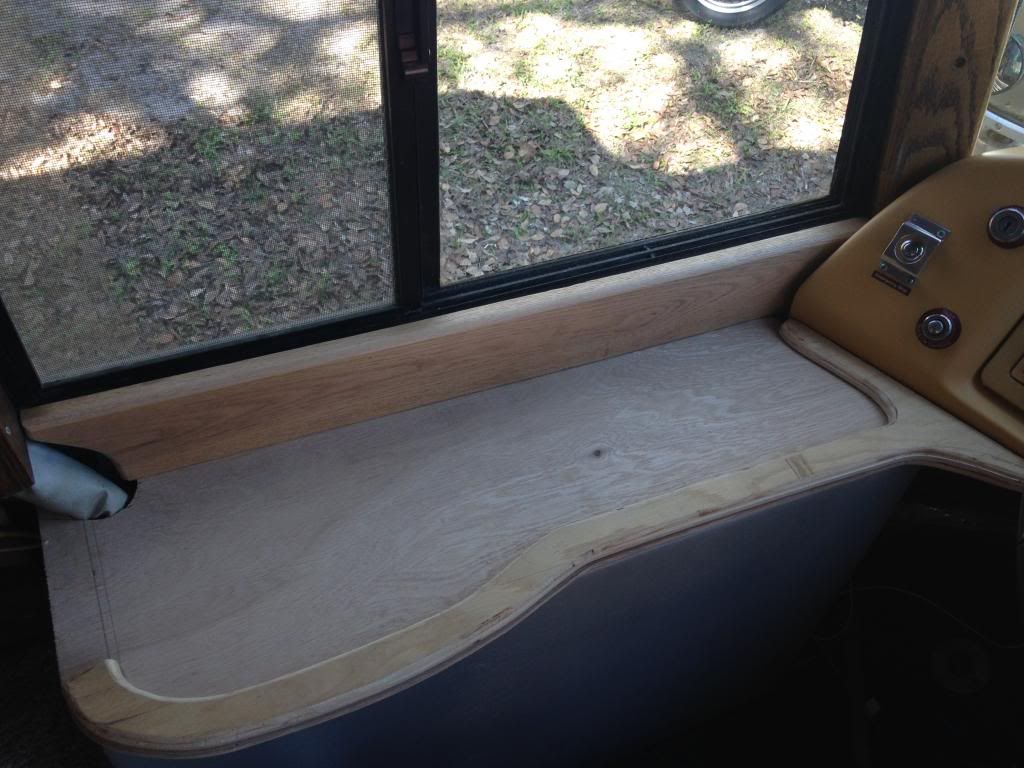
Here, the Side panel has been stained and cleared, flat upper surface wrapped with material and fitted.
[img]http://i1207.photobucket.com/albums/bb4 ... G_0923.jpg[/img]
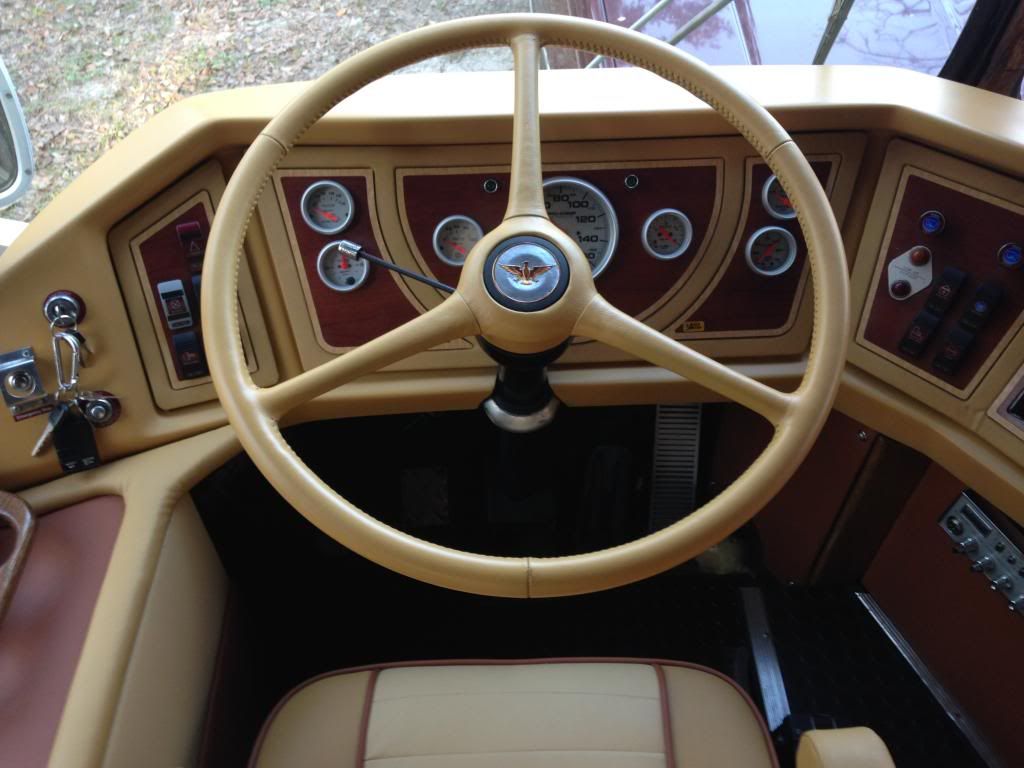
I dyed the steering wheel leather with an automotive spray designed for leather and vinyl. I restored the horn button although this probably is not correct as far as colors but I thought it looked good.[img]http://i1207.photobucket.com/albums/bb4 ... G_0937.jpg[/img]
[img]http://i1207.photobucket.com/albums/bb4 ... G_0945.jpg[/img]
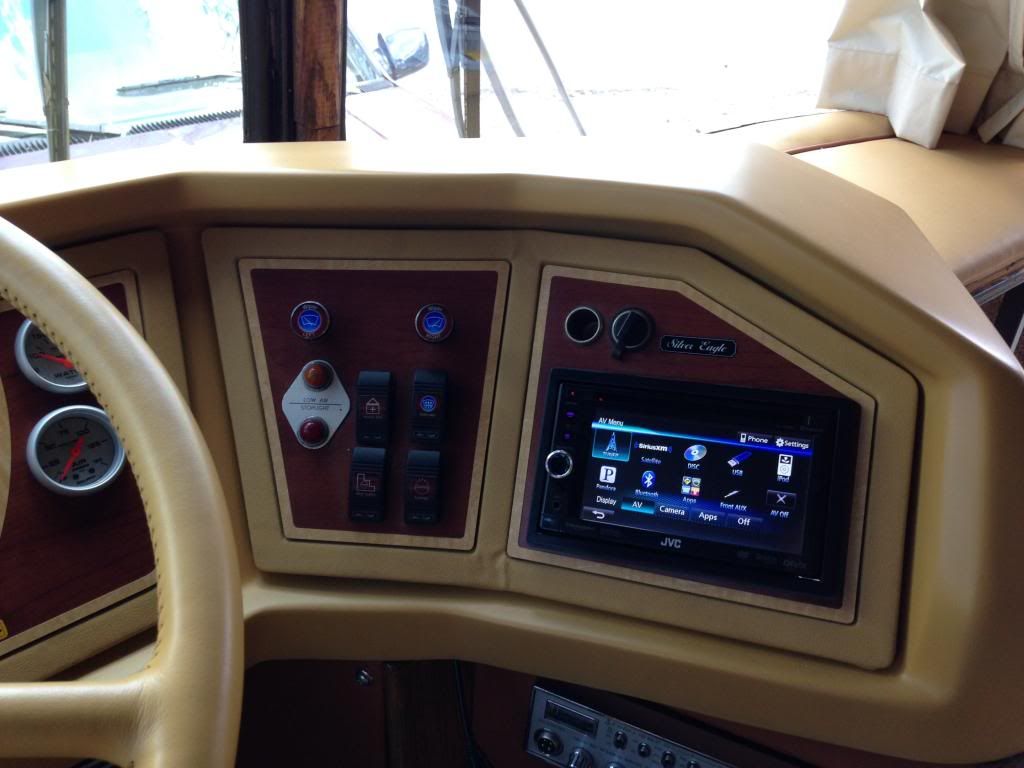
Here is the New Head Unit-Wow it makes this Eagle Dash Come to Life. I designed all of the Switch Labels individually for specific uses and had a Vinyl shop print them off including Wiper ID's
[img]http://i1207.photobucket.com/albums/bb4 ... G_0977.jpg[/img]
I will put a few more Final Pics later this week after I have it all detailed out from the remodel.
[img]http://i1207.photobucket.com/albums/bb4 ... G_0060.jpg[/img]
This is the Original Design I Drew on the Computer. Don't use the measurements, I changed them before cnc cut it all out.
[img]http://i1207.photobucket.com/albums/bb4 ... Dashv2.png[/img]
Here I was playing with more ideas
[img]http://i1207.photobucket.com/albums/bb4 ... G_0073.jpg[/img]
This is the center panel after it was made on a cnc machine and before it was wrapped in Leather.
[img]http://i1207.photobucket.com/albums/bb4 ... G_0076.jpg[/img]
Here, the new Autometer Gauges are in position and the leather is wrapped around the edges. The Turn Signals were bought at Radio Shack. Who would have guessed?
The Center Speedometer is programable and is claimed to work on the eagle.
[img]http://i1207.photobucket.com/albums/bb4 ... G_0100.jpg[/img]
The dash is back in the bus for fitting. I Sprayed R&M Dash with a Matched Automotive paint designed for Vinyl and Leather. The CNC work really changes the look.[img]http://i1207.photobucket.com/albums/bb4 ... G_0106.jpg[/img]
This is the Circuit Breaker Box I made.
[img]http://i1207.photobucket.com/albums/bb4 ... G_0854.jpg[/img]
Here is the whole dash with the gauges and new rocker switches in place. The circuit breaker box fit nice and I designed it that way to give compliment to the left side of the dash. [img]http://i1207.photobucket.com/albums/bb4 ... G_0862.jpg[/img]
Now I added the Oak Cup Holders on side rest pamel and checking to make sure seat doesn't rub circuit breaker box
[img]http://i1207.photobucket.com/albums/bb4 ... G_0866.jpg[/img]
Here, the Side panel has been stained and cleared, flat upper surface wrapped with material and fitted.
[img]http://i1207.photobucket.com/albums/bb4 ... G_0923.jpg[/img]
I dyed the steering wheel leather with an automotive spray designed for leather and vinyl. I restored the horn button although this probably is not correct as far as colors but I thought it looked good.[img]http://i1207.photobucket.com/albums/bb4 ... G_0937.jpg[/img]
[img]http://i1207.photobucket.com/albums/bb4 ... G_0945.jpg[/img]
Here is the New Head Unit-Wow it makes this Eagle Dash Come to Life. I designed all of the Switch Labels individually for specific uses and had a Vinyl shop print them off including Wiper ID's
[img]http://i1207.photobucket.com/albums/bb4 ... G_0977.jpg[/img]
I will put a few more Final Pics later this week after I have it all detailed out from the remodel.