Page 1 of 3
Dan's 1982 Model 10
Posted: Sat Apr 20, 2013 7:53 pm
by Boone
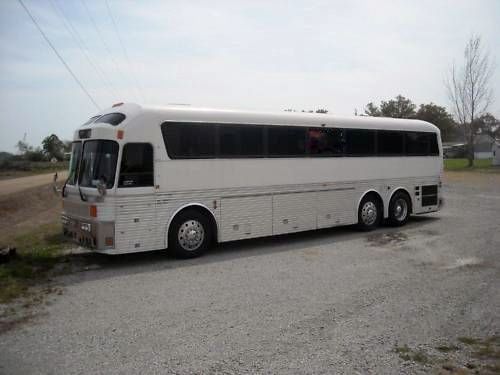
Well, here we go. We started with seated 1982 model 10 with 330,000 miles that my wife named Miss Scarlett. She is a Gone With The Wind fan and says that Miss Scarlett never let anything stop her from getting where she wanted to go. Let's hope that our Miss Scarlett is just as tough as the one in the movie.
The plan for our bus isn't to have a full time rv but will be used as a "weekender" for a few days to a couple of weeks at a time. We found the bus in Louisiana and drove it about 800 miles home in 98 degree weather with no problems and made a few more short trips of 100-300 miles before parking and beginning the process of conversion in Jan 2012. We even met Songman down below Dalton GA on one of our weekend trips.
Re: Dan's 1982 Model 10
Posted: Sat Apr 20, 2013 8:25 pm
by Boone
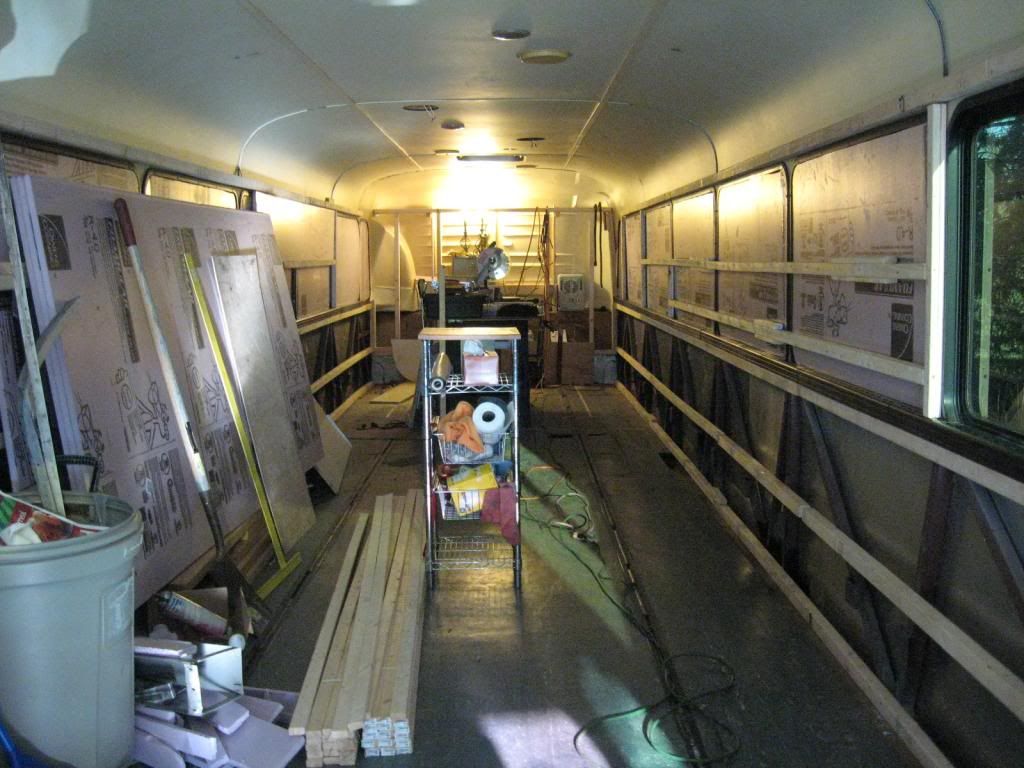
Getting started on a cold January day. We stripped out all the seats and interior walls, then removed the wall insulation. During the winter we left the walls bare so we could watch for leaks. We found plenty of those. The rubber around the outside windows leaked in a few places and the top marker lights in the center of the bus were the last ones we tracked down. All in all it took several weeks to get her dry. I drilled holes in frame members near the floor only to have water run out around the drill bit! Be sure the screws that hold your window trim in place are sealed.
Re: Dan's 1982 Model 10
Posted: Sat Apr 20, 2013 8:33 pm
by Boone
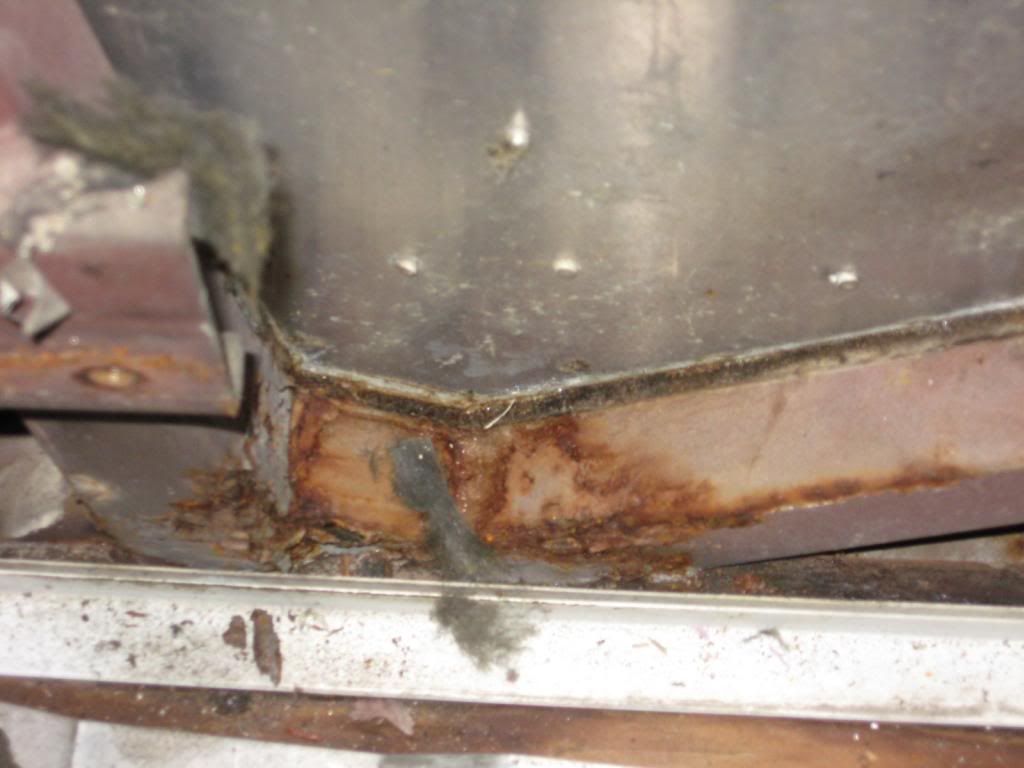
We only found 2 places where the leaks in the walls had caused rust. The bus had been painted a couple of years ago and it is possible that some of the leaks began after the paint job as the holes in the trim under the windows was not sealed. This was underneath the center marker light on the driver's side. There was one more spot like this near the front door. Both were still solid so I used a wire wheel on them and applied plenty of undercoating.
Re: Dan's 1982 Model 10
Posted: Sat Apr 20, 2013 8:46 pm
by Boone
We chose to do a few things differently than most of the conversions I see online. First, I LOVE the looks of a clean original Eagle so I won't be skinning windows or adding roof air. The air will be in the back cargo bay along with the tanks, pumps and whatever else I can squeeze in there. I used a lot of pink foam board and DAP Alex Plus caulking to help seal and glue things in place. It won't melt the foam and I've fixed some serious cracks with it when painting houses and know the patches to last 20 years or longer in the weather. It will last in a bus.
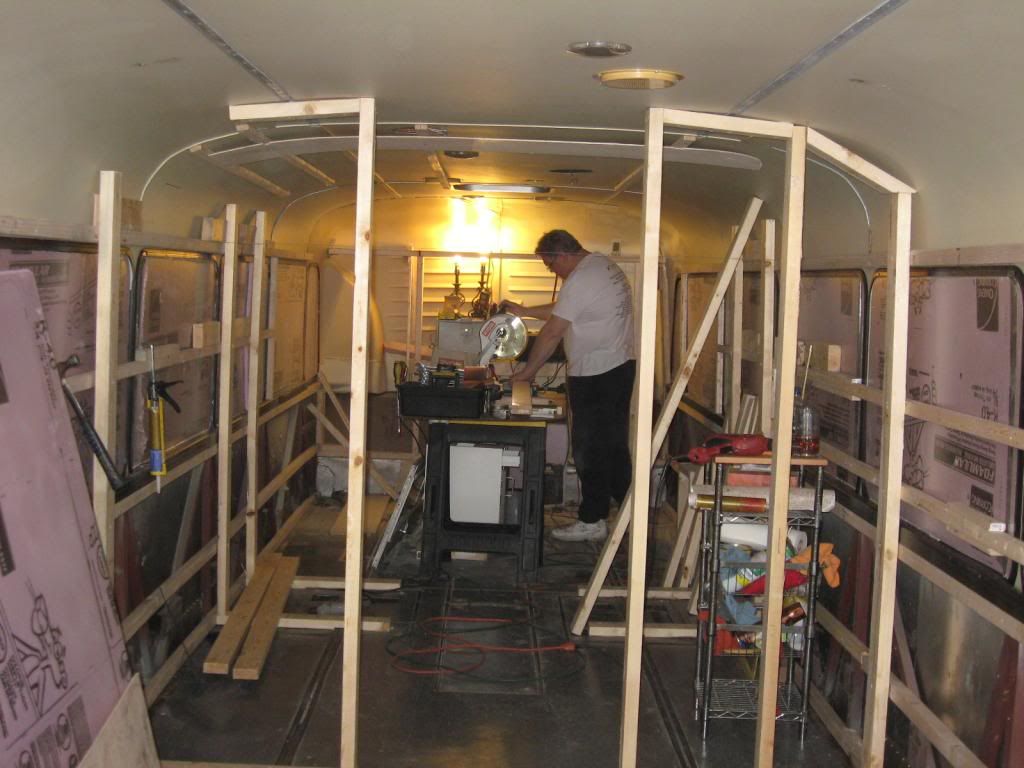
I chose to run my wall framing horizontally instead of vertical. I did a MCI 5 once and ran them vertically and this just seemed easier for this bus. I also did it because I planned to angle the top corners instead of rounding them and running the 2x2's this way worked well.
Re: Dan's 1982 Model 10
Posted: Sat Apr 20, 2013 8:54 pm
by Boone
Another thing I decided was that I would use as much house building materials as possible. I like the looks and strength of 2x4 walls and planned to use luan as sheeting. This method takes a lot of patience, cutting, fitting, gluing and finally screwing the whole thing together. Once it is in it is incredibly strong which makes me feel better about things in the back coming toward the front in case of an accident.The refrigerator gets it's own cubby hole between 2x4 walls to keep it firmly in place.
Re: Dan's 1982 Model 10
Posted: Sat Apr 20, 2013 9:09 pm
by Boone
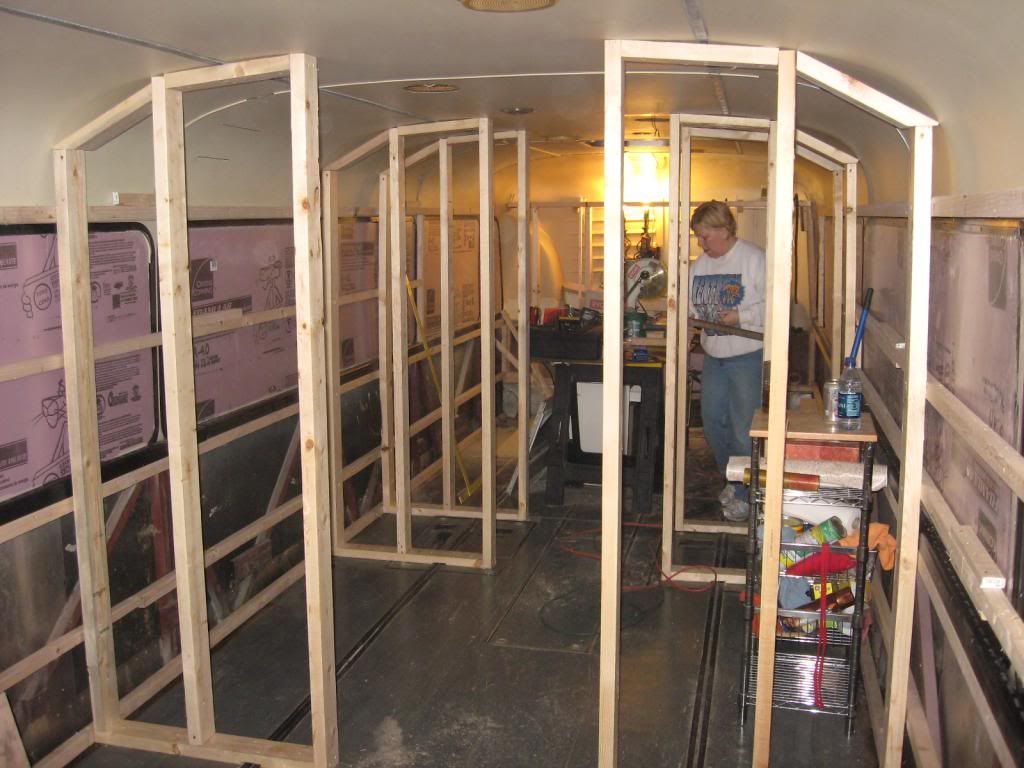
It is starting to take shape. We will have a queen sized bed in the rear bedroom with a center hallway from front to back. We saw an Eagle on a lot in Nashville once that we liked and decided if we ever built one we would use a similar floor plan.
The back bedroom area uses about 8'6". Walking forward from the bedroom the bathroom is next and will have a 24" closet on each side, a 36" vanity and commode on the driver's side and a 36"w shower and some cabinetry on the curb side. All together the bathroom uses another 8'. The kitchen/dining/living area will use the front 16'. That's about how it worked out; after building a straight wall across the back of the bedroom we had roughly 32-33 ft from that wall to the back of the driver's seat. With 3 2x4 walls across the bus some would argue that I wasted space but I felt it was worth it to get the final look we wanted. It was also nice to be able to use standard electrical boxes and switches.
Re: Dan's 1982 Model 10
Posted: Sat Apr 20, 2013 9:20 pm
by Boone
We decided not to pull down the ceiling and factory insulation. We did pull down a few places for inspection and what was there looked as good as anything I might have added since I didn't plan to spray foam. From everything I have read about other conversions there isn't a huge r-value difference between the various methods so I decided to use 3/4" x 1 1/4" strips on the ceiling and use 3/4" foam between them.
After reading every argument online about stranded wire vs Romex I decided to use Romex and fasten it well so it cannot move. Mission accomplished by using a zillion of the little plastic fasteners. It won't move. I did stranded wire in plastic conduit in the MCI 5 project and it took forever. The Romex was much easier to use.
I also reused part of the original bus 12v lighting system. It will only carry current for some LED fixtures and will probably get hooked up to the house battery at some point.
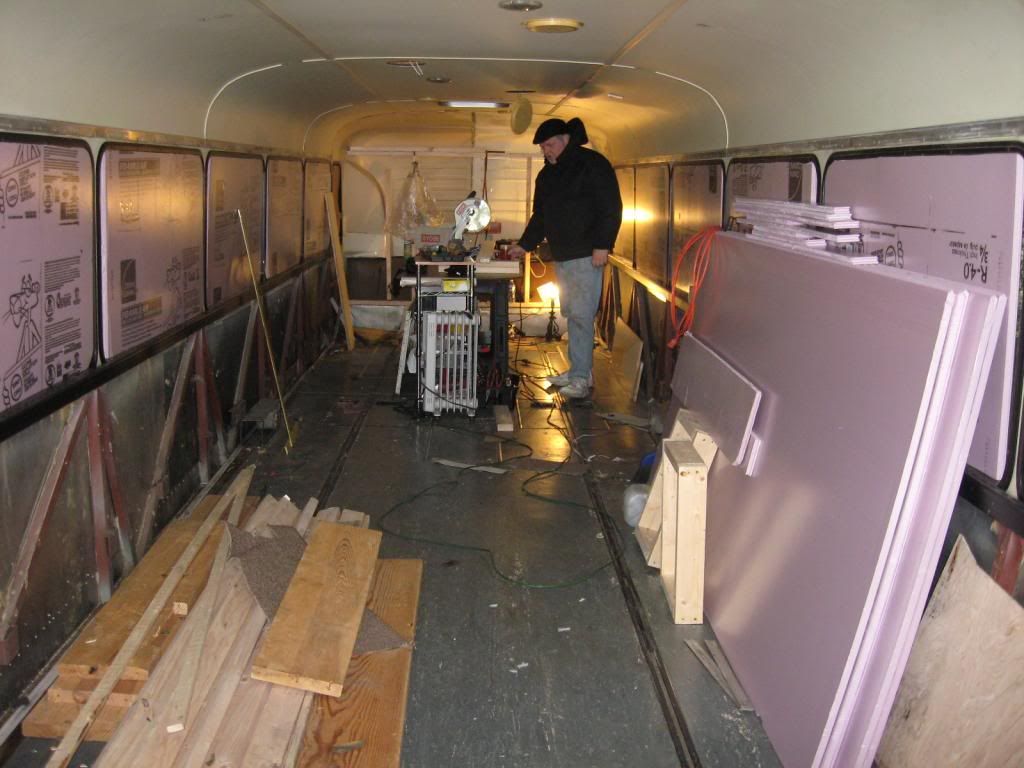
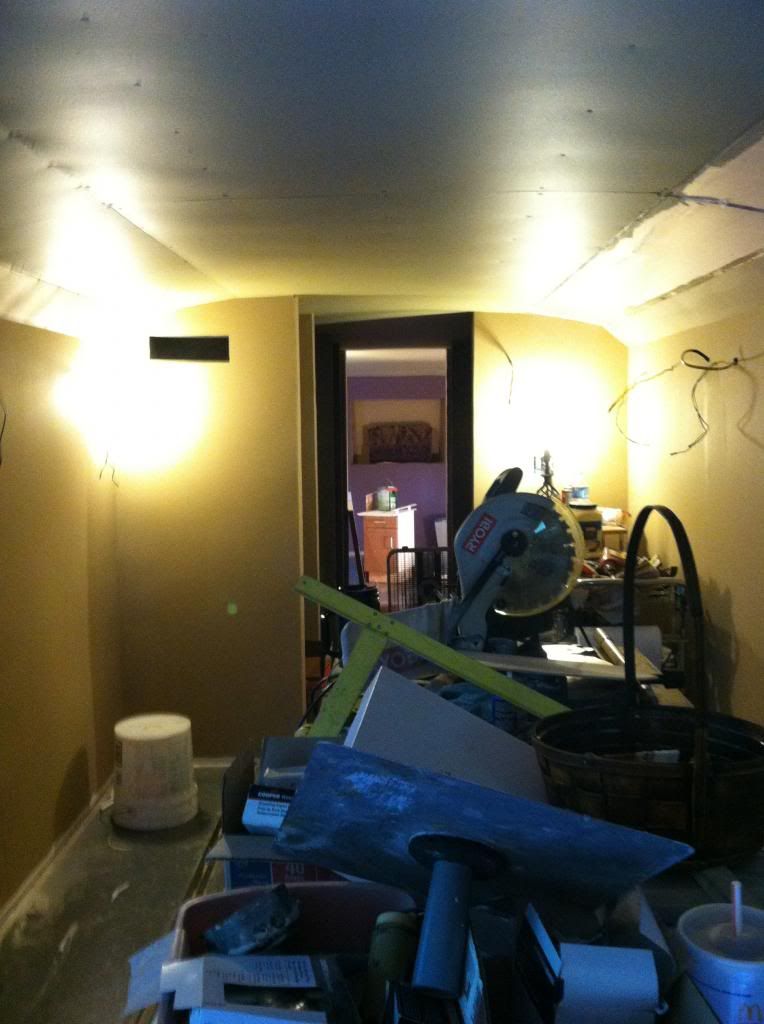
I bought two things that made a huge difference in doing this bus project. The first one is the rolling cart in the middle of the room. I loaded all my tools, various boxes of screws and everything else on it. It was like a custom work station. Caulking guns hung at the ready and it moved from room to room as I did. The second thing I couldn't have lived without is the little yellow brad nailer on the bottom shelf of the cart. It was worth it's weight in gold! Those little 2" 18 guage brads would even hold 2x4's together long enough for me to drill and get the screws in them.
This picture shows how I angled the corners instead of keeping them round.
Re: Dan's 1982 Model 10
Posted: Sat Apr 20, 2013 9:50 pm
by Boone
We got a little carried away when we started hanging the 1/4" luan and forgot to take pictures. We used liquid nails and the 18 gauge brad nailer and sheeted everything just as you would sheetrock a house. The ceiling got 1" drywall screws because a copper or tin ceiling is planned for it's future.
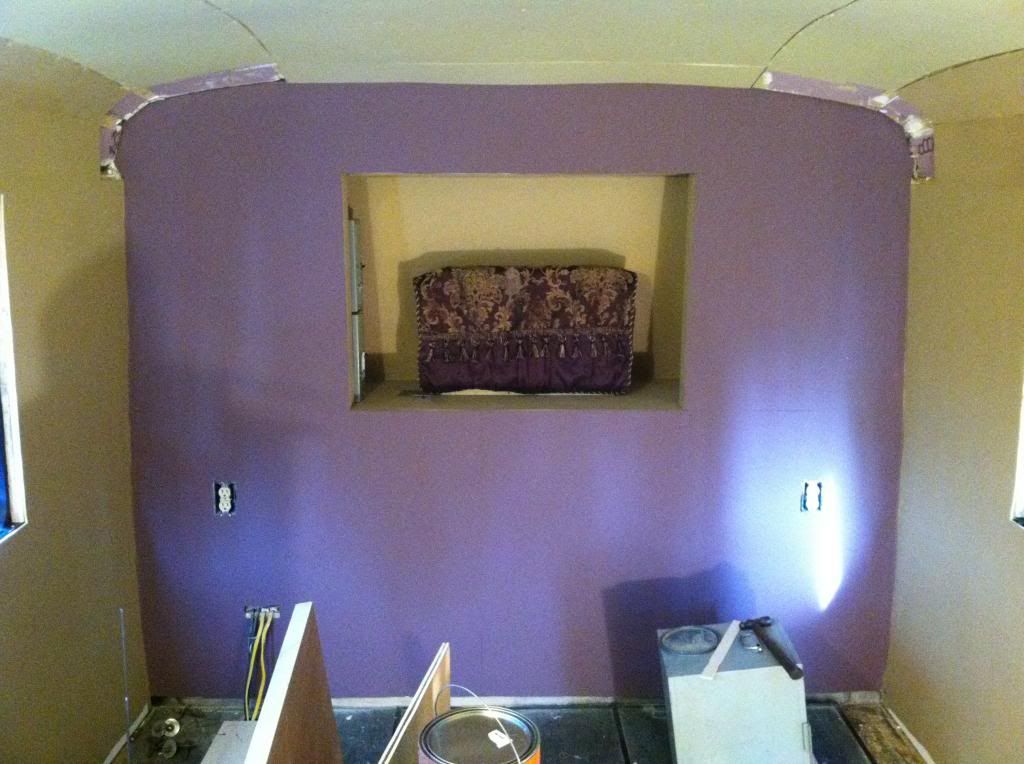
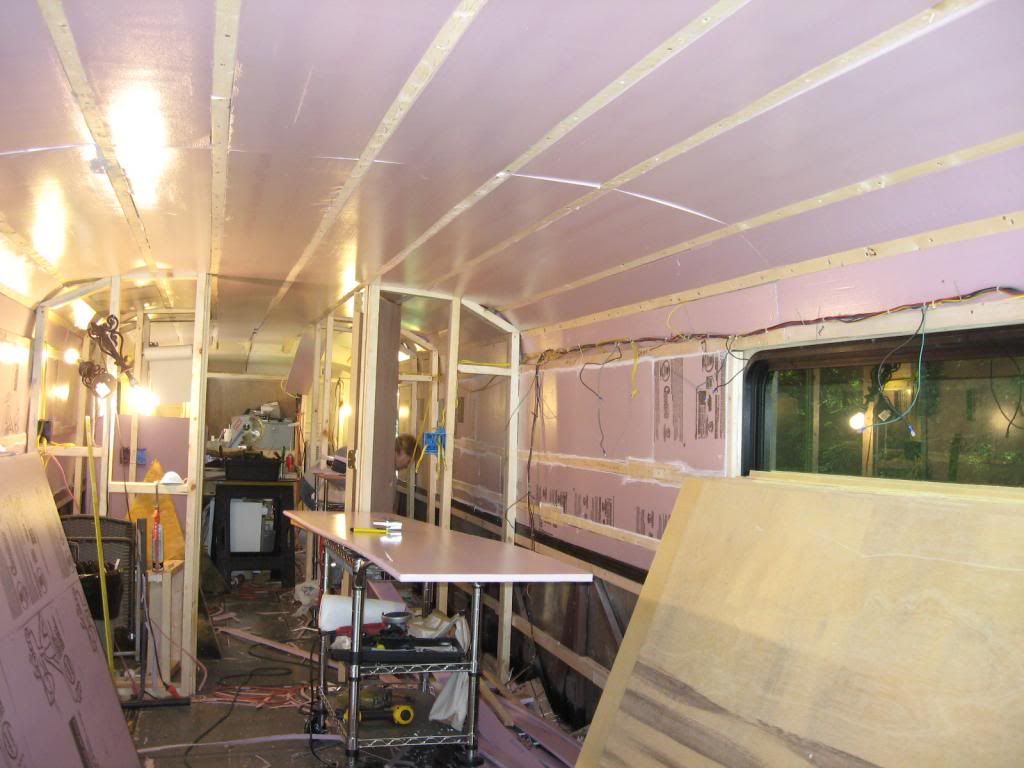
I used the DAP caulking at the corners and was quite surprised when I rolled a coat of primer on it. I had planned to use some type of coverings like commercial vinyl but liked the look of the paint and decided to go with it. I've done remodeling for years and have learned over the years how to fix cracks and make things look good so I spent about a week getting it ready for paint and really think I made the right choice.
The rectangular hole at the top left is an AC vent that blows cold from a temporary 12,000 btu house window unit in the basement. I built that wall a little thicker to get the CFM I needed and let the air come up inside the wall. It started as an experiment but allowed me to work all summer with the bus sitting in direct sunlight. If it keeps working that well it might become permanent. The electrical outlet there is for a flat screen TV.

Re: Dan's 1982 Model 10
Posted: Sat Apr 20, 2013 9:58 pm
by Boone
COLOR!
Re: Dan's 1982 Model 10
Posted: Sat Apr 20, 2013 10:04 pm
by Boone
This is the bedroom back wall. I wanted a straight wall for the nightstands and bed to sit against and managed to make use of some of the space behind it. My electrical breaker boxes are in there and there is enough room to put a few things you might want to store. Remember guys, whatever you build will look better if you let HER pick the colors!