Page 2 of 2
Re: Mike & Kathys 67 M0del 01
Posted: Sat Apr 07, 2012 4:49 pm
by rusty
Nice work Mike. Are you and Kathy going to be in Nashville hope to see all your hard work in person.
Wayne
Re: Mike & Kathys 67 M0del 01
Posted: Sat Apr 07, 2012 7:33 pm
by Dreamscape
Looks great! I really like the paint job in the engine compartment!

We're almost twins!

Re: Mike & Kathys 67 M0del 01
Posted: Sun Apr 08, 2012 2:58 am
by sunlovers
Wayne
Our plans as of now are to arrive Tuesday and leave Saturday. Kathy has to fly out from Myrtle Beach the following Monday to Seattle for a week of training.
Paul
I guess this summer I will work on the body and get it ready for paint. The hard part is going to be the area where the last rear (small angle ) window was. When it was covered they cut the panel, put adhesive on the back and put it in place (filled in the joint with Bondo) and painted over it. I have started on the drivers side by cutting the joint some (removing Bondo), filling in with matting, sanding that down then laying down two layers of fiberglass sheeting. Since I started working in that area that panel has popped loose from the frame where it was glued down. I guess now I will need to drill three holes (close to the rear side glass) in the panel and rivit it back down, cover with fiberglass, sand and prime.
We still haven't decided on the color. I was thinking RED on the upper area but Kathy likes Blue (67 SS Chevelle). I guess we will wait till then and see.
How is your project coming? Haven't seen any pic's in a while. Have you finished the engine/tranny swap yet? How about the power steering?
Re: Mike & Kathys 67 M0del 01
Posted: Sun Apr 08, 2012 7:03 am
by Dreamscape
I hope to put some fire to it next weekend. My original drive line was no good. I've been collecting parts to have a new one built and then cut down to length. It is soooo close I can smell the it!

Power steering might come after I've completed the first stage. Need to make sure there will be no hiccups!

Then we'll sand a paint ours when the weather warms up and there is no chance of rain! Yeah right!
Re: Mike & Kathys 67 M0del 01
Posted: Fri Mar 29, 2013 10:57 am
by ericbsc
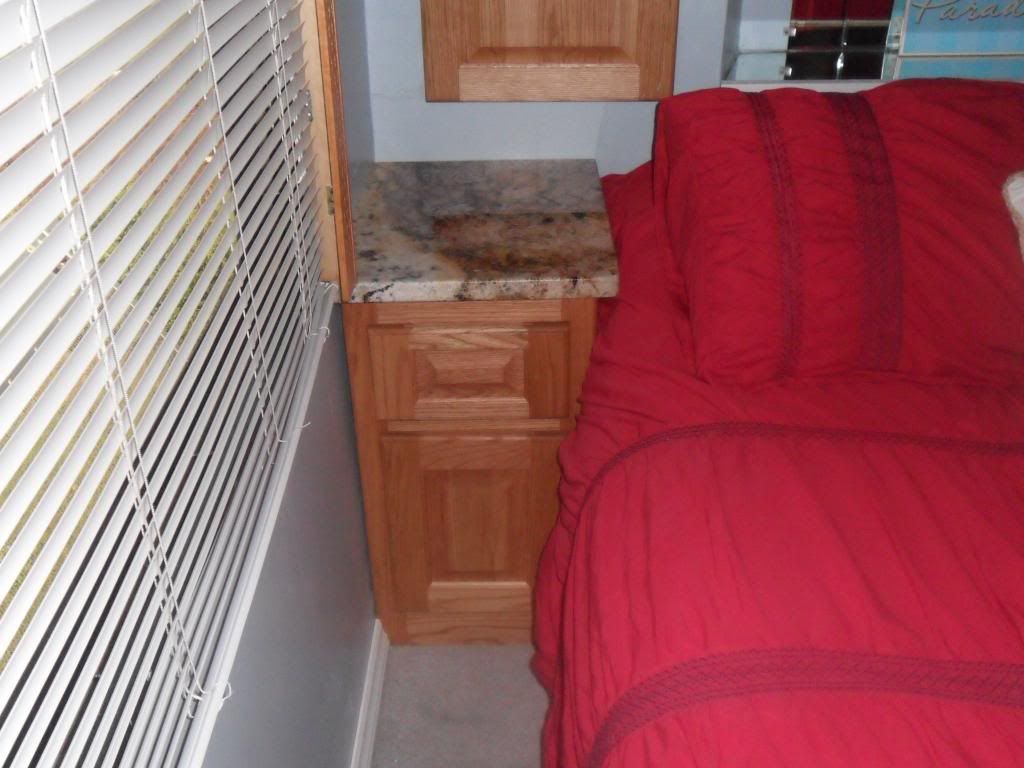
Mike and Kathy's new bedroom cabinets. What do you think Mike??

Re: Mike & Kathys 67 M0del 01
Posted: Sat Mar 30, 2013 12:24 pm
by sunlovers
Sorry Eric, I have been to busy looking and reading everything else on here and didn't see the post. Night stands look great. I assume the headboard doors will look the same.
Great job!!!
thanks
Re: Mike & Kathys 67 M0del 01
Posted: Mon May 27, 2013 6:44 pm
by sunlovers
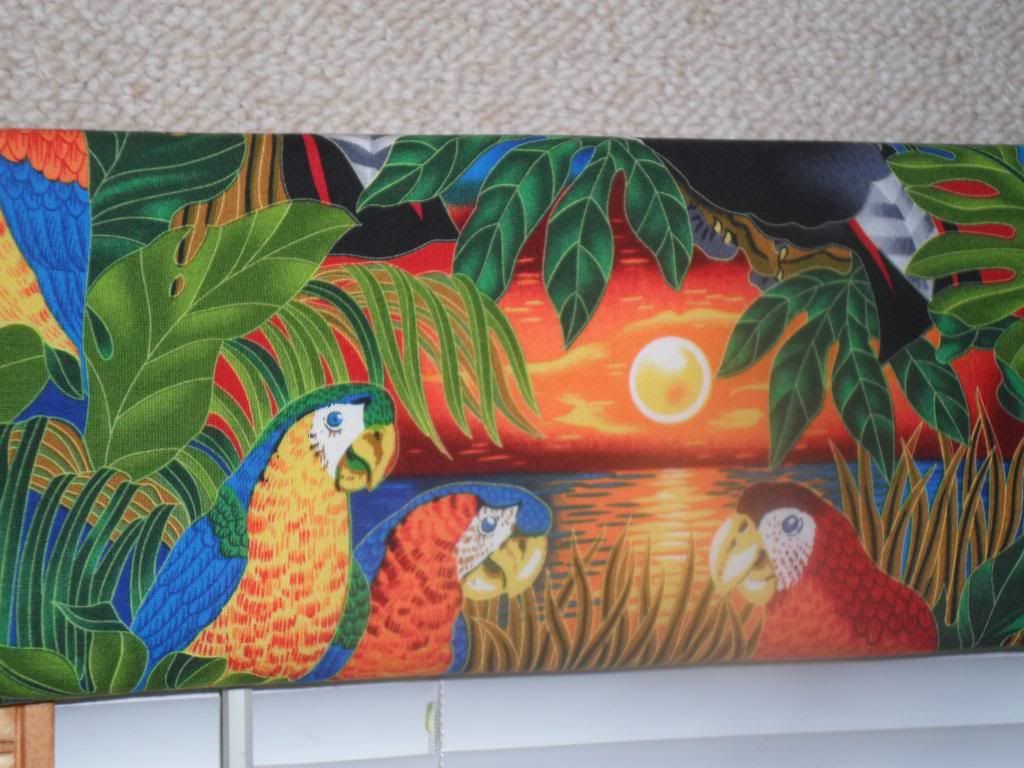
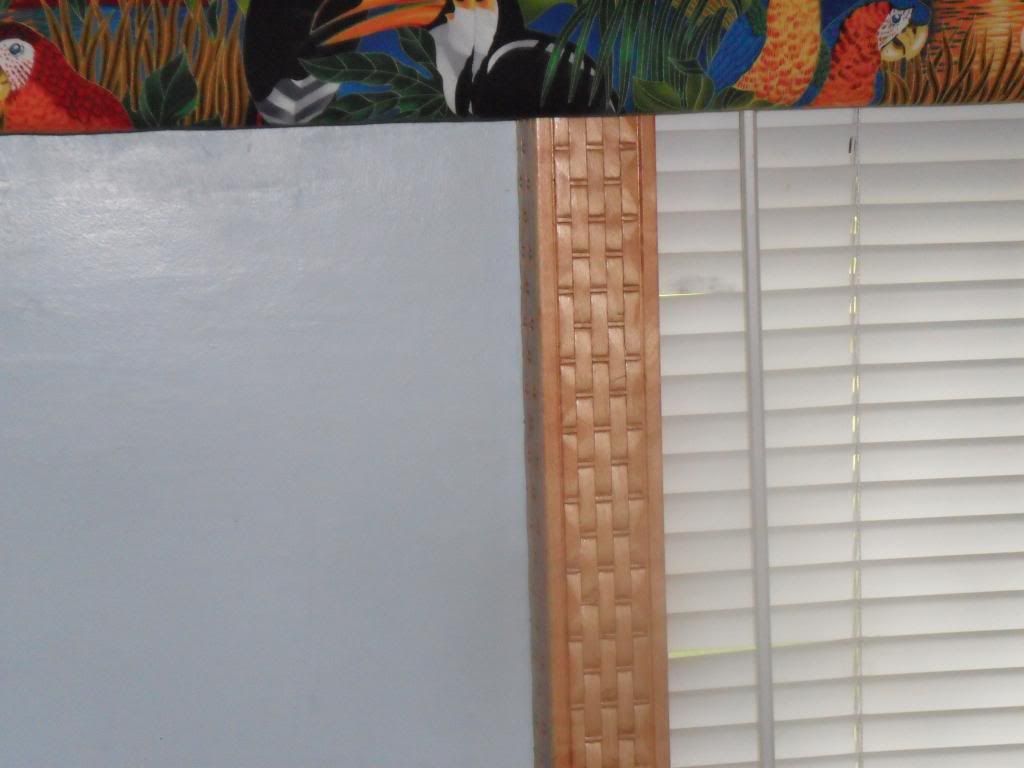
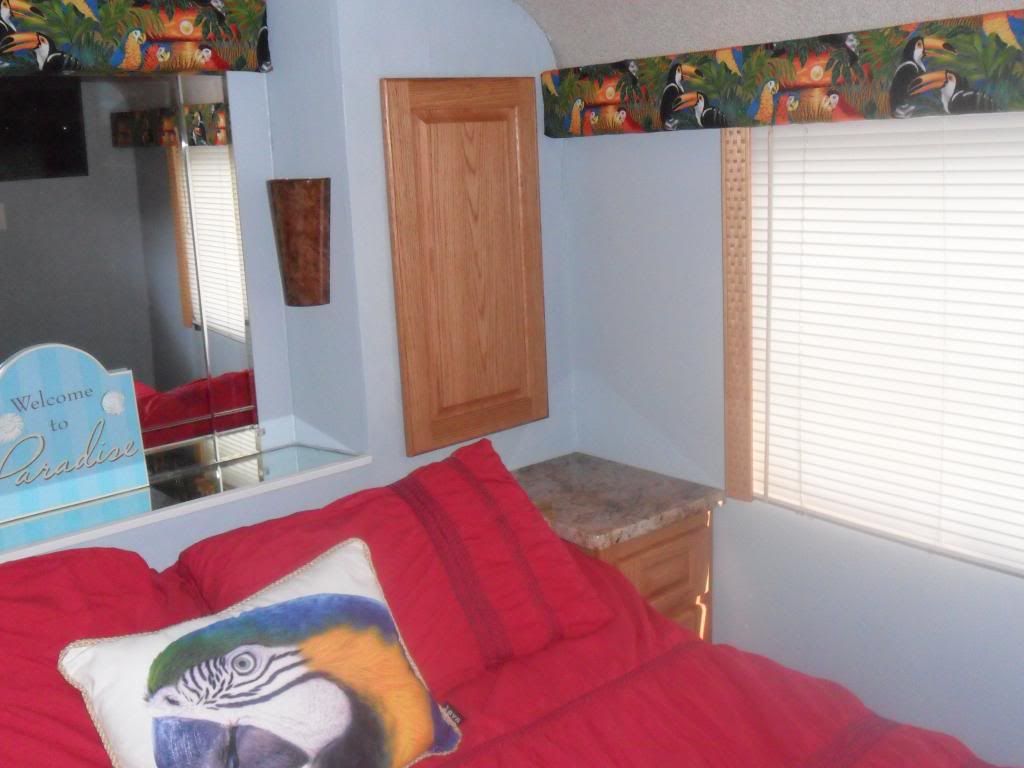
Well after weeks of working in the bedroom of the bus its finished for this time. Kathy found some material that goes with our theme (parrots and island life) and proceeded to install one inch foam padding on the horizontal valances then install then parrot print material.
While I was at it I found some molding at Lowe's and made the vertical valances and stained them with a Golden Pecan stain.
After that I enlisted the help of Eric Brown in Boiling Spring, SC to make new night stands and headboard door. The items were made of Oak wood and stained with a Golden Pecan stain. Tops are tan granite.
Re: Mike & Kathys 67 M0del 01
Posted: Tue May 28, 2013 3:12 pm
by Dreamscape
Lookin' good Mike and Kathy!
You know they are never finished, or haven't you heard that! hahaha
Re: Mike & Kathys 67 M0del 01
Posted: Wed May 29, 2013 7:20 am
by sunlovers
Yes, that's true. But as Eric likes to say "while were at it......", and that's how the bedroom got done.
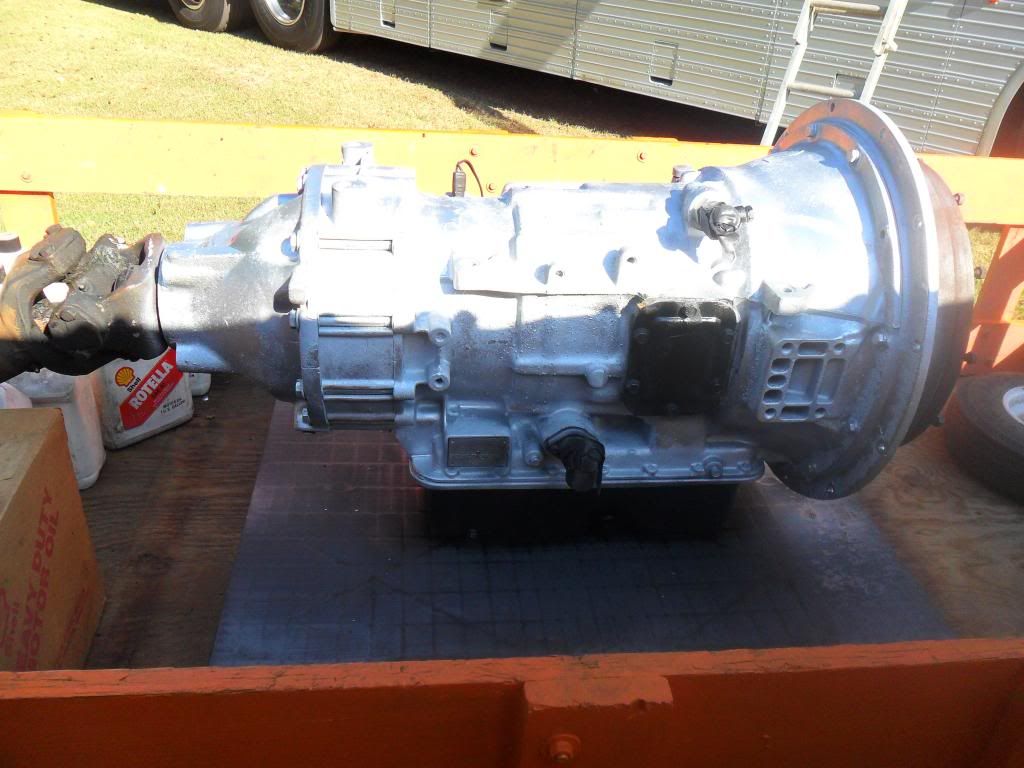
NEW ALLISON TRANNY
Posted: Wed Sep 25, 2013 8:27 am
by sunlovers
Well, "while we are at it", we decide to install an Allison automatic transmission in our bus. Got all but a few pieces from Ed Brenner (Ed is doing a re-power to a series 60 and a bigger Allison tranny).
We will be installing the cable, making and mounting the shifter tower, installing the air throttle and all its tubing and the transmission cooler before we take it to the shop for the transmission to be installed.